Linux Bind Camera To Fixed /Dev/Video – Set a Fixed /dev/video Path for Cameras!
Learn how to bind a camera to a fixed /dev/video path in Linux using udev rules, ensuring consistent device recognition for automation and multi-camera setups.
We’ll discover how to identify your camera, set up custom rules, and maintain stable device paths across reboots. It’s a practical solution for managing multiple cameras and automating workflows efficiently.
Why Bind a Camera to a Fixed /dev/video Path?

There are several reasons you may want to assign a fixed path to your camera in Linux, particularly when dealing with multiple video input devices. Here’s why:
- Consistency in Automation: Automation scripts or software like OpenCV, motion detection, or live-streaming applications rely on accessing specific camera devices. Without a fixed path, your software might access the wrong camera after reboot, leading to failures or unexpected behavior.
- Multi-Camera Systems: If you’re managing multiple cameras, such as in surveillance setups or multi-angle video recording, it’s crucial to maintain fixed device paths. This ensures the correct camera feeds are always mapped to their respective applications or video sources.
- Error Minimization: By having a fixed device path, you minimize the risk of confusion or errors caused by switching device nodes. This is especially important for professional or critical setups like video surveillance, live broadcasting, or monitoring systems.
How Does Linux Assign Device Paths?
Linux uses a device manager called udev to handle device nodes dynamically. When a camera is plugged into the system, udev assigns it a path under /dev, such as /dev/video0, /dev/video1, etc. However, the order in which devices are detected and assigned is not always consistent.
The device numbering can change based on factors such as which USB port the camera is plugged into, or the order in which multiple devices are recognized during boot.The good news is that Linux provides a flexible way to manage these devices using udev rules. By creating custom rules, you can control how devices are assigned and create fixed device paths.
Step-by-Step Guide to Binding Camera to Fixed /dev/video:
Use lsusb to find idVendor, idProduct, and optional serial for your camera.
Create Udev Rule:
Open the rules file:
bash
Copy code
sudo nano /etc/udev/rules.d/99-fixed-camera.rules
Add this rule:
bash
Copy code
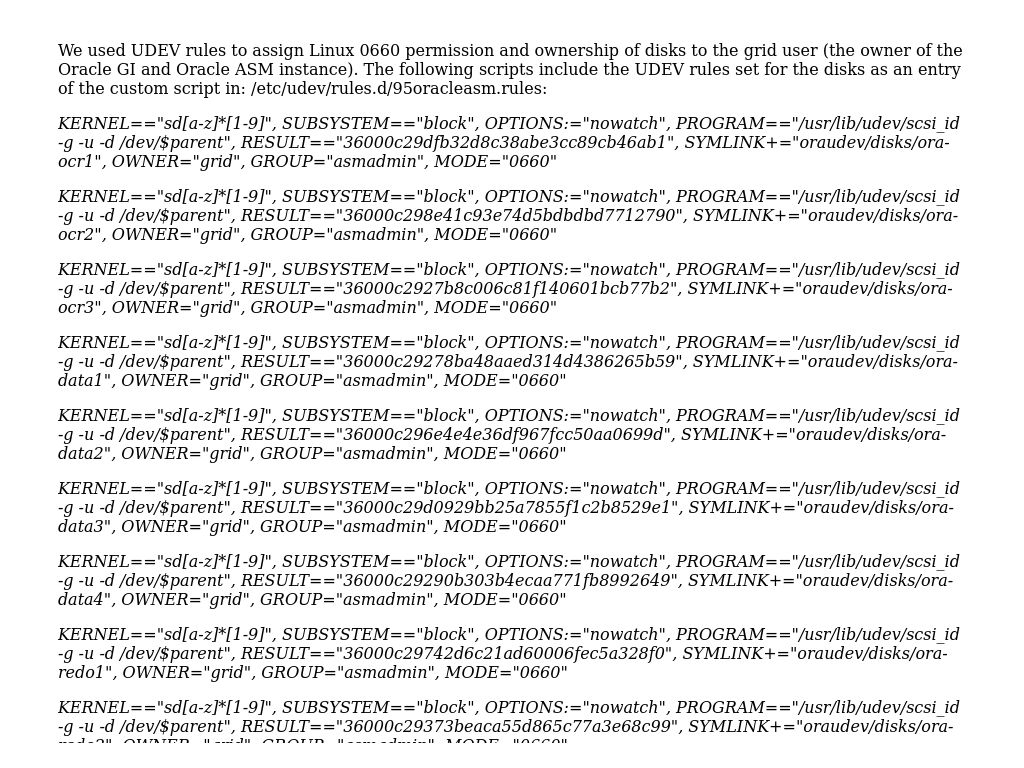
SUBSYSTEM==”video4linux”, ATTR{idVendor}==”046d”, ATTR{idProduct}==”0825″, SYMLINK+=”video-cam”
For serial-specific rule:
bash
Copy code
SUBSYSTEM==”video4linux”, ATTR{idVendor}==”046d”, ATTR{idProduct}==”0825″, ATTR{serial}==”C0276A20″, SYMLINK+=”video-cam”
Reload Udev Rules
bash
Copy code
sudo udevadm control –reload-rules
Verify Symbolic Link
bash
Copy code
ls -l /dev/video*
Manage Multiple Cameras
Assign unique paths for each camera:
bash
Copy code
SUBSYSTEM==”video4linux”, ATTR{idVendor}==”046d”, ATTR{idProduct}==”0825″, SYMLINK+=”video-front”
SUBSYSTEM==”video4linux”, ATTR{idVendor}==”046d”, ATTR{idProduct}==”0826″, SYMLINK+=”video-back”
This ensures consistent camera paths regardless of dynamic /dev/videoX assignment.
Read More: Are Bolide Or Verkada Cameras Better – An In-Depth Analysis!
How Do I Create a Udev Rule to Bind My Camera to a Fixed Path in Linux?
To create a udev rule that binds your camera to a fixed path, start by identifying the camera’s unique identifiers using the lsusb command. This will provide you with the idVendor, idProduct, and optionally, the serial number of your camera.
Once you have this information, open a new file in the udev rules directory, typically located at /etc/udev/rules.d/. You can name this file something like 99-fixed-camera.rules to ensure it loads with a high priority.In this new file, you will write a rule using the identifiers you gathered. For example, you might add a line that looks like this: SUBSYSTEM==”video4linux”, ATTR{idVendor}==”046d”, ATTR{idProduct}==”0825″, SYMLINK+=”video-cam”.
After saving the file, reload the udev rules with the command sudo udevadm control –reload-rules. Finally, verify that the symlink is created correctly by running ls -l /dev/video*, which should show that /dev/video-cam points to the actual device node. This setup ensures that your camera always appears under the specified path, making it easier to reference in scripts and applications.
Best Practices for Udev Rules:

- Descriptive Naming: Use meaningful names for your symlinks, such as /dev/video-usb, /dev/video-front, or /dev/video-capture. This makes it easier to manage and identify your devices later.
- Test Thoroughly: After creating the udev rules, always reboot the system to ensure that the fixed paths persist across reboots.
- Use Serial Numbers if Available: If your camera provides a unique serial number, it’s good practice to use it in the rule to avoid conflicts, especially if you use multiple devices
- of the same make and model.
How can I ensure that my camera always uses the same /dev/video path in Linux?
To ensure your camera consistently appears under the same /dev/video path, you need to create a custom udev rule. This rule will identify the camera based on its unique attributes, such as idVendor, idProduct, or serial number, and assign a symbolic link like /dev/video-cam.
By doing this, even if the system dynamically changes the /dev/videoX assignment, your camera will always be accessible through the custom link you created.Once you’ve created the rule and reloaded the udev configuration using udevadm control–reload-rules, you can verify the setup by running ls -l /dev/video*.
This command will show the symbolic link pointing to the actual device node, ensuring the camera can be referenced consistently. This is especially useful when you work with multiple cameras or need to integrate the camera into scripts or applications that require a fixed device path.
Troubleshooting Common Issues:
- Device Path Not Changing: If your camera still doesn’t appear at the new fixed path, check for typos in the udev rule file, particularly in the vendor or product IDs. Run udevadm info again to double-check.
- Multiple Cameras Conflict: If you have multiple cameras of the same model, try using serial numbers in the udev rules to distinguish them.
- Permissions Issues: In some cases, you may face permission issues. Ensure that the user running your application or script has permission to access the device node or symlink.
FAQ’s
1.How do I find my camera’s unique identifiers in Linux?
Use lsusb to get the idVendor, idProduct, and optionally the serial number.
2.How do I create a udev rule to fix the camera path?
Create a file in /etc/udev/rules.d/ and add a rule based on the camera’s unique identifiers.
3.What command reloads the udev rules after editing?
Run sudo udevadm control –reload-rules.
4.How can I verify that the fixed path is working?
Use ls -l /dev/video* to check if the symbolic link points to the correct device.
5.Can I assign unique paths for multiple cameras?
Yes, create separate udev rules for each camera with different symlink names.
Conclusion
Binding a camera to a fixed /dev/video path in Linux can save you from the headaches of dynamically changing device paths, especially in multi-camera setups. By creating a simple udev rule, you ensure that your camera always appears under the same path, providing consistency and reliability for scripts, applications, and automation tools.


